In the previous two posts, we covered Jim Leavitt’s coverage structure with 2-high safeties. Now we are going to cover his main coverage concepts with 1-high safety. Leavitt primarily runs 1-high safety looks in run-first down-and-distance situations and when he is going to blitz.
Leavitt ran two forms of Cover 3 when sending four rushers, both of which operated by the same coverage rules as Alabama’s Nick Saban and Brent Venables of Clemson. (Note: If you really want to get into the details of those rules, you can learn about them here. It is not necessary, however, in understanding any part of this post.)
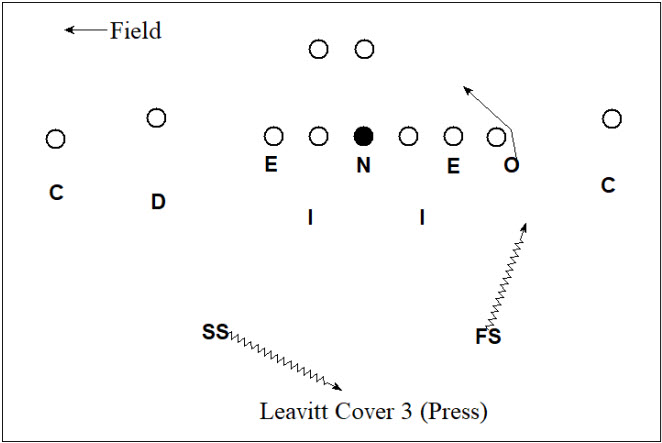
The first version (above) had the corners playing from a press alignment and the safety coming down within about 5 yards of the line of scrimmage.
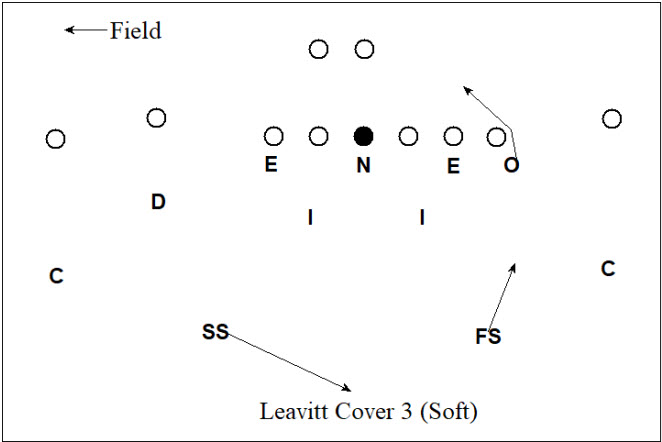
The second version (above) had the corners play from an off alignment and the both safeties hanging at about 10 yards from the line of scrimmage before the snap, then only rotating after the snap.
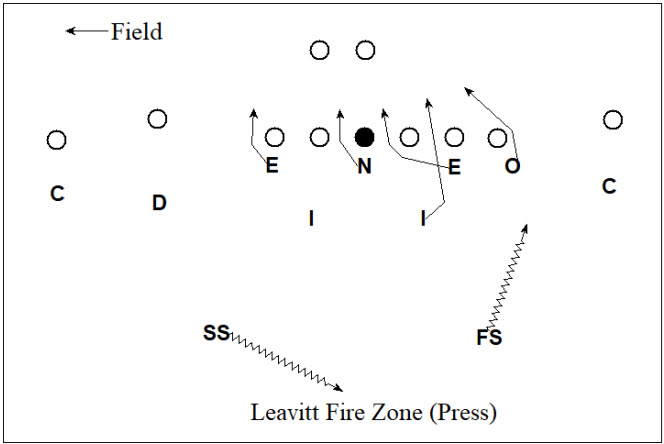
When sending five rushers, Leavitt ran two forms of the Fire Zone Blitz (above) that mirrored his Cover 3 coverages. One had the corners playing from a press alignment and the safety coming down within about 5 yards of the line of scrimmage.
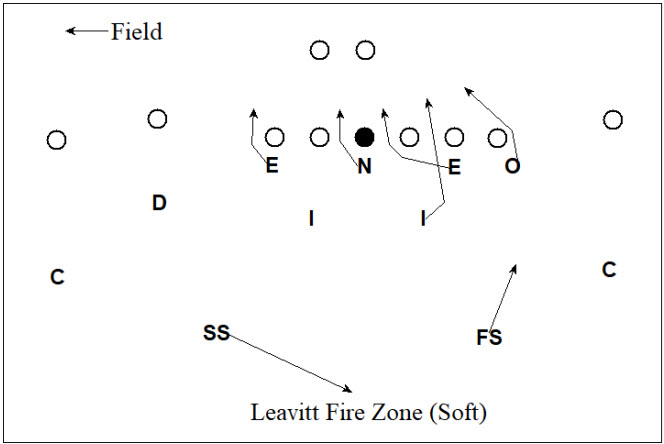
The second form of Fire Zone Blitz (above) had the corners play from an off alignment and the both safeties hanging at about 10 yards from the line of scrimmage before the snap, then only rotating after the snap.
Why have both versions? Initially, I thought Leavitt’s preference was dictated by how he judged the strength of the quarterback’s arm and the speed of the outside receivers. But the more film I watched, the more it seemed as a method of disguising the coverage to the opposing quarterback. Regardless of theory, sometimes alternating between the two worked pretty well (e.g., against Kalil Tate and Arizona), and sometimes it didn’t (e.g., against Keller Chryst and Stanford).
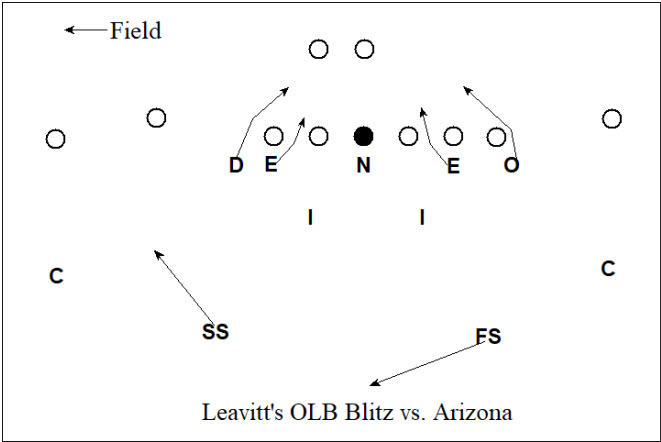
And here’s as good a time as any to mention that Leavitt ran the same blitz, shown above, on nearly one-third of the snaps in their game against Arizona. If that sounds a bit crazy to you, understand that it worked really, really well. Kalil Tate just never seemed to be able to figure out the coverage while under pressure this entire game. It’s a hallmark of Leavitt’s play calling in general: if it ain’t broke, don’t fix it.
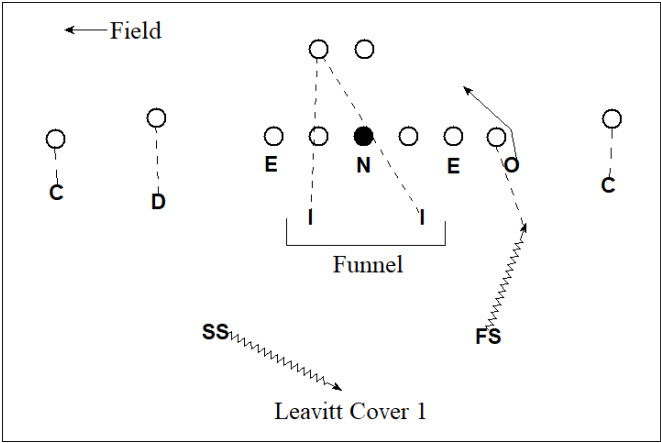
When Leavitt wanted to run Cover 1, which was fairly often, he’d just rotate his safety to the same side as his rushing outside linebacker. Another Nick Saban defensive strategy that was in Autzen last year was the Rat, and the Funnel concept and it will be interesting to watch for the variations of these in 2018.
Cover 1 for Saban is what most coaches call Cover 1 Robber. There will be one deep safety and one player in the hook area – the Rat – eyeing the quarterback and robbing any routes over the middle. If the quarterback scrambles, then the Rat will mirror the quarterback horizontally until the quarterback crosses the line of scrimmage; only once the quarterback has crossed the line of scrimmage will the Rat play run responsibility.
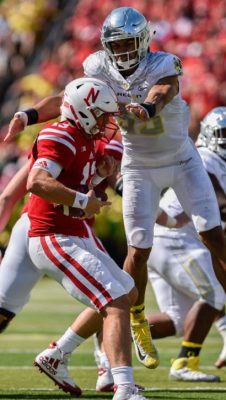
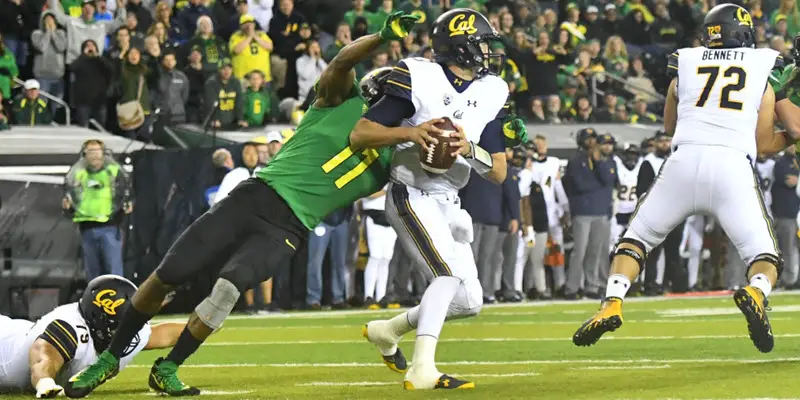
Troy Dye has a sack from the Fire Zone Blitz.
Like Saban and Venables, he appears to have his two inside backers run a Funnel concept. (diagram above) To quote my article on Saban:
“Funnel means that two players will eye the running back, and the near side player will take the running back if he breaks to one side. The opposite side player will become the Rat. So if the running back goes to the right, then the right Funnel player will take the running back, and the left Funnel player will become the Rat. Funnel serves two purposes.
First, it ensures the nearest linebacker will have responsibility for the running back, who is commonly faster than their linebacker counterpart. Having the far side linebacker, for example, try to get across and match the back is only inviting disaster. Second, it increases the likelihood the Rat player is dropping from the side the quarterback isn’t looking post-snap. Most offenses like to use half-field reads with the running back as the third option. By having the Rat come from the backside increases the likelihood the quarterback will not see him while reading a front side on a dig or other crossing route.”
Overall, it worked pretty well, despite being about as simple a play as you can get at the college level. Sometimes fancy and complicated plays are just that: fancy and complicated. Simple can be good, too.
The Red Zone
When backed up into the red zone, Leavitt’s most common play was to run a Cover 0 Rat double outside linebacker blitz from a Tite front.
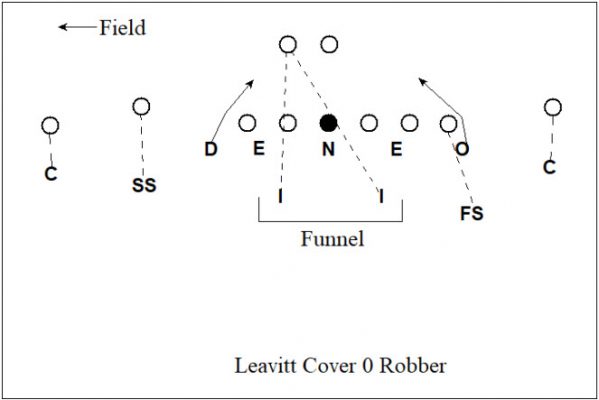
Cover 0 simply means there is no deep safety.
The Eight-Man Drop
An eight-man drop (or three-man rush) is where only three players will be rushing the quarterback. The idea here is to flood the coverage with an extra man to make it more difficult for quarterback to get a clear read on the coverage and complete a pass. It comes with the obvious downside of losing an extra guy to rush the passer. But if your three rushers are pretty good already and you need help shoring up the coverage, it can be a solid tradeoff.
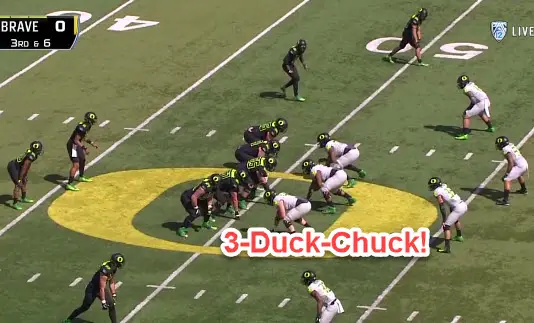
8-Man Drop (3-Duck-Chuck was a term used on this site before)
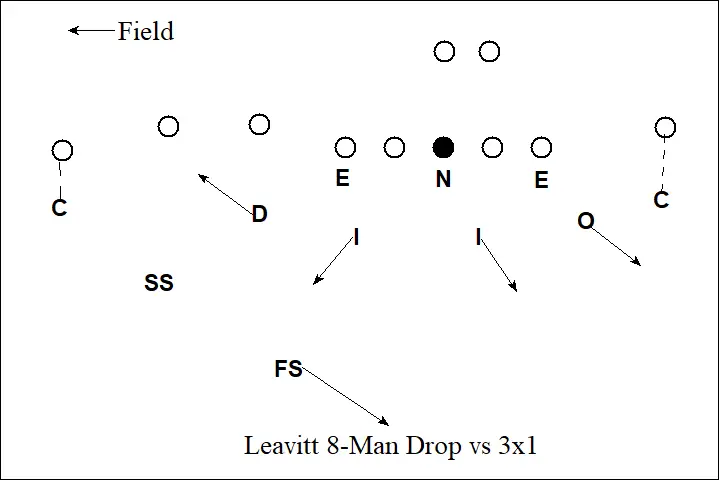
Leavitt appears to have a single eight-man drop play at his disposal that adjusts based on offensive formation. Against 2×2 sets, it will operate like Quarters (or 2-Read) to each side with an extra Hook player inside. Against Empty (aligned or motioned to), this will convert to Stubbie to the strong (3-man) side with the weak (2-man) side coverage staying in Quarters (or 2-Read). And against 3×1 sets, it converts to a form of Cover 3 outlined below:
Charles Fischer referred to the 8-Man Drop as 3-Duck-Chuck, and we see it being effective (above) for former Defensive Coordinator Nick Aliotti.
Leavitt 8-Man Drop vs. 3×1
Strong Corner – Man on No. 1 unless No. 1 goes under, then zone off to deep third while eyeing No. 2.
Strong Safety – Align over No. 2, if any. Man on No. 2 unless No. 2 goes under in the first 5 yards, then zone off to the curl-to-flat, looking to rob No. 1.
Strong Apex – Take first man to the flat (frequently No. 3). If none, then eye quarterback from flat area.
Strong Hook – Zone to strong hook. Reroute any strong No. 3 going vertical to deep middle.
Weak Hook – Zone to weak hook. Reroute any weak No. 3 going vertical to deep middle.
Weak Safety – Drop to deep middle of the field
Weak Apex – Man on No. 2 unless No. 2 goes under in the first 5 yards, then zone off to the curl-to-flat, looking to rob No. 1.
Weak Corner – Man on No. 1 unless No. 1 goes under, then zone off to deep third while eyeing No. 2.
Leavitt runs this eight-man drop fairly frequently against pass-heavy teams (e.g., Wazzu) to flood all of the available zones. But against more balanced and run-heavy teams, Leavitt will stick almost exclusively to a four-man rush.
Conclusion
As hopefully as this series of analyses showed, Leavitt’s defense is not particularly complicated, but it is effective. Leavitt’s ability to disguise his fourth rusher and develop better execution by his players did wonders for Oregon’s defense from the 2016 and 2017 seasons. I would expect Leavitt’s defense, however, to enlarge with even more tools to attack opposing offenses in the upcoming season. I hope you have enjoyed learning more about the Ducks defense. Thanks.
Cameron Soran
Hillsboro, Oregon
Top Photo by Scott Kelly
Recent Defensive Analyses for Learning the Jim Leavitt Defense by Cameron Soran
Analysis 1: Understanding the Basic Structure of the Jim Leavitt 3-4 Defense
Analysis 2: The Jim Leavitt 3-4: Oregon’s Defensive Fronts
Analysis 3: The Jim Leavitt 3-4: Triangle Coverage with Two-High Safeties
Analysis 4: Oregon’s Trips Coverage with Two-High Safeties under Leavitt
Related Articles:
Football Strategy and Analysis: How Games Are Really Won
How Oregon Will Defeat Indiana in the 'Natty Semi-Final
Analysis: What Oregon Must Do Against Indiana
FishDuck Finds Freshman Flashing Upside at Spring Game
How Oregon is Building the New Wall on Offense
Will Stein's New Shotgun Full House Backfield
Cameron Soran is a practicing business attorney in Hillsboro, Oregon. While not a Duck fan himself, he is an avid fan and analyst of Pac-12 (and Notre Dame) football in his spare time. He is also a contributor at https://rileykolstefootball.com/. You can follow him on Twitter @cameronsoran

